The pirate ebay: Fabbing

This can be interesting: The Pirate Bay is sharing 3D models for printing, so far only using the category Physibles on the original site. Right now there are mostly dupes of stuff from Thingiverse, and seeing as the interface is the usual forum link-dump there’s no preview or version control, but it’s still an interesting development for two reasons: For one, once 3D sharing sites will start to be harassed on IP-issues, there will be be a chilling effect on the distribution and usage of models, so we’ll need a safe haven for that. TPB has proved rather resilient.

(Further on, it’s easy to foresee 3D-printers which won’t print non-signed models, taxation on printing materials used privately, consumer protection laws which are stretched to encompass personal fabrication, etc, so there will have to be forums to discuss circumvention and open source practices)

Think about it this way: If piracy of IP today mostly is a concern for a few companies in the western world – regardless if it’s clothes, movies or medicine — what will happen when the manufacturing industries start to feel threatened by the infringement on their manufacturing prerogative? Previously, someone ordered 1000 Gucci bags from your factory and you spat them out, regardless if the person you ordered them from was a pirate or Gucci; either way, you had a business model – making stuff. If now the pirates are not only threatening the IP of some of your clients, but also the necessity of including you in their piracy, you’re suddenly standing with a factory without orders.

I think that fabbing can be a boon to humanity in many ways, but as always with disruptive technologies there will be a huge backlash, and the sooner we can build infrastructures for dealing with reactionary policies the better. Which ties in with the second reason this is interesting, which has to do with the development of a public discourse on the subject.

So far the ideas surrounding fabbing are best described in science fiction and by those in the field – Bruce Sterlings Shaping Things comes to mind — but they’re slowly gaining mainstream attention; Petter told me he saw 3D printing mentioned in a lifestyle & decoration magazine which usually is concerned with spring colours and feelgood food. Just as in art though, the debate will sooner or later come down to what we are printing, rather than that we are printing, and if TPB can be a platform to foster experimentation with fabbing, we’ll have another generation which is used to remix and copy and paste and mash things up, only now with physical objects rather than media. But for that to happen there needs to be practice and debate, and tpb putting it’s weight behind the issue can only accelerate that.

Doing the RepRap #13 — Printer finished

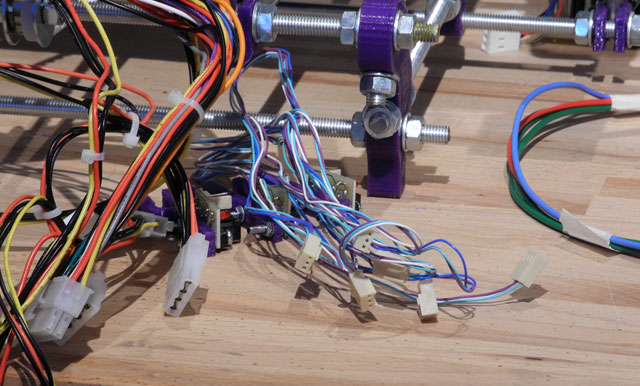
It’s been a long road, but my Reprap Mendel Prusa 3D printer is finished and I’m printing stuff. There have been so many problems and fuckups along the way, that when I finally started printing stuff a week ago I didn’t think much of it, but with hindsight it was a Grand Moment™. I’ve joined the ranks of 3D printers. You may now commence the “oohing” and “aahing” I understand are my dues.

So far, with the exception of a frog and a replacement LM8UU Y axis holder, I’ve mostly been printing calibration cubes. These are shapes intended to troubleshoot your printer and give you an opportunity to get your Skeinforge/Sfact setting correct. As you can hear in the video there’s some rattling going on on the Z-axis, and I have some trouble with Y-alignment on some prints, but with lowered acceleration on Z and Y, and perhaps tightening of the belt on the latter, I think I’ll be able to print halfway decent parts.

Sara came over for a few days, and as any good boyfriend I set about making her feel comfortable helping out with the build. It was much appreciated as it often seems I have three hands too few to get something assembled. Making the print bed was slow going, and as I’m using plexiglass for print surface we broke off a couple of pieces before getting a more-or-less square one. The plexi is actually good for printing on cold, at least once the PLA starts sticking to it, but if your hotend gets too close the PLA fuses with the surface, and you’ll inadvertently run the head through the board which will create pockmarks in the surface, and possibly plug your nozzle with plexi — which is the reason I’m printing with the 0.5mm nozzle instead of the 0.35 I started with.

[x_video_embed no_container=”true”][/x_video_embed]

We were leveling the print table for a good two hours, and found that the design with springs between the lower and print bed wasn’t optimal, since the springs were unevenly springy. I had bought a whole kit with the suckers but none seem to fit well enough and give enough force to work. It’s a good design on paper, but we found that it was just easier to use two sets of nuts per fastener bolt. Protip: Get spanners which fit instead of fiddling with adjustable ones or pliers; it’ll save you so much time and temperament it’s worth the expense.

At this moment thanks might be in order. A great amount of those go out to Traumflug for design and massive help with the electronics, and Kliment, Triffid_Hunter, Action68 and everybody else who’s been quick to lend support in #RepRap on IRC or on the reprap.org forums. When you’re as ignorant of a subject as I was about the RepRap, you rely on the help and input of friends and strangers, and without the support of everyone from awesome girlfriend Sara to KKV electro to that guy who barely spoke English but cut me some metal rods, this project might have fallen over and not gotten up after any of innumerable stumbles.

Of course, thanks to the people here in Turku for providing an incentive to start this, as well as the means and time to finish it. Ultimately, bigup to Adrian Bowyer for getting the RepRap project started, as well as all those who keep improving upon it. I have a public presentation of the project on Thursday 6th October at 1800 in Gallery Titanik in Turku, and if you’re nearby I’d love to see you there.

Turku: The art bit

For the past three weeks I’ve been in Turku, in the studio of Gallery Titanik, whacking away at the RepRap Mendel Prusa 3D printer. I’ve been kept so busy toiling with this that I’ve lost sight of the grander scheme of things, like why I’ve been building the printer in the first place. I’ve been putting off communicating what I’m doing not because I don’t think it’s worthwhile, but rather because the more immediate problems of finding screws or getting the electronics to work seemed so much more pressing; and besides, it ought to be obvious what I’m doing, no?

Then again, every once in a while it’s good to remind oneself that one of the few telling differences between an artist and a crazy person is that an artist at least nominally does her stuff for an audience, while the crazy keeps to herself or only occasionally performs for medical personnel.

If the Work of art in the age of reproduction spoke about the disappearance of aura, of authenticity and a direct interaction between any one artist and her audience, the means of reproduction through RepRaps and similar DIY machines reintroduce at least the authenticity of the machine — or its configuration, parts and calibration — into the object.

There are things about fabbing which sets it apart from traditional reproduction, as for example there is no original on which any copy is modeled but only a digital model created to exist in a different medium from that of any physical copy. Any artworks which are printed from a CAD file are originally only ever mathematical descriptions in a 3D-file format on computer storage. So although the printed object isn’t unrelated to the artwork, it certainly has a random element to it, a stutter in its materiality.

Historically art was about creating objects which based on esthetics and social function were considered “artistic,” then around the time of Fountain it became explicitly about an artistic aura, and then fluxus removed even the “work” part of “art work” which after post-modernism left us with the free-for-all shit buffet we’re at today. Perhaps fabbing could at least offer a lifesaver?

With fabbing, we have the possibility of having art which is highly conceptual, but which manifests itself physically not by the mediation of the initial artist, but rather through printers — machines and their operators — which exist in a DIY sphere and so are all different, temperamental, uneven; In another word, they are unique. But just as we don’t give artistic merit to the assembly-line worker who manufactures the printer with which we print our photographs, we are unlikely to attribute artistic merit to whomever assembled the printer which prints our CAD-models.

Rather, an actualized 3D-print might be the artwork of an artist, but it’ll have the aura of the machine, or rather the aura of the DIY home fabrication process of building and tuning the machines; If movements can impart aura, it’s an aura of industry dependent on craft, an inversion of industrialization, transforming engineers into cottage industry artisans churning out other peoples art objects.

nathan7: and I want a good print
nathan7: a really good print
nathan7: without overhangs ruining things
nathan7: it’s about the end result here

From a discussion on IRC #RepRap

The idea of personal fabrication is positioned to affect the manifestation and appreciation of art as soon as some critical mass and manufacturing capacity is reached: The result will be analogue objects bearing the likeness of art; not simulacrum or simulation, but a second order relation to the artwork, twinned with the aura of machine. Perhaps fabbing can be a disruptive enough technology to change the artists role into something new, something interesting, something other than making artworks.

Doing the RepRap #7

It’s been a busy couple of weeks here at HQ, consisting mostly of me troubleshooting my Gen7 1.2 board in the forums and on IRC. You can read of my ordeals under the title “Getting movement with Teacup + Gen7 1.2” and my aborted attempts at troubleshooting the (probably dead) Pololus is here: How to check if A4988 is fried?

Finally, Traumflug offered to take a look at the board if I could send it to Germany. I dropped it in a mailbox quicker than you can say “Spitze!” and worried my head about getting a multimeter which wouldn’t give me random readings instead. A couple of days later I got an email back which opened with:

Your board arrived today. It took me something like a minute to find the bridge … :-) See the attached picture.

Which at once had me feeling happy that it’s solved, and rather dull for not having spottet the short. I actually got a small microscope and went over the board to find shorts, but I ignored the areas easily visible by the naked eye… Since I have very little dignity left to salvage I’m taking this in stride and the board is on it’s way to Turku, where I’ll assembly the 3D printer. Shouldn’t take more than a day or so, right? What could go wrong?

Speaking of being on it’s way to Turku: I’m writing this at Landvetter airport — amongst screaming children and the smell of fear which is probably I — and my plane leaves in a while. I’m drinking expensive beer and hoping that my luggage is under the weight limit. Seeing as this is my first residency, I’m looking forwards to having a change of scenery and a deadline for the project. Although these open-ended processess are all good and fun, actually setting print to paper — or plastic to Turku, as it were — will feel nice.

As for the multimeter, at first I got the Fluke 115 — all the reviews list Fluke as the doubleplusbest — but switched to an Agilent U1242B after watching the one hour “multimeter buying guide” with David Jones over at the EEV blog (it gets better once you get used to his voice. Your ears take five six hours to adapt, in my experience). The deciding factor was that the Agilent had μA while the Fluke only did mA — I’m not good enough at these things to know when I’ll be using what, but will take others word for it. Also, the Agilent can use temperature probes which might be handy if I’m calibrating the Makergear hotend or the heated bed.

Ok, enough with this light banter. Off I go.

Doing the RepRap #6 — repair, rebuild, rejoice, despair.

In anticipation of fucking shit up I had ordered two ATMegas and having succeeded once it took me one try to get the bootloader to take this time around. The board looked fine, but after a lot of trial and error, error, and error, I resigned to the fact that my Pololus probably were fried and ordered new ones. And that, kids, is how you literally burn 600 SEK by being a lazy bum and not double-checking your solders. Lesson learned and so on.

Having received the new Pololus, and with an extruder underway from the States and the plastic parts coming over from Australia, I only need to get the motors to spin to have a semblance of a printer up and running. I have most metal parts except for some springs and wingnuts, and to celebrate the birthplace of the machine I got some SKF 608 bearings. Oh, and I still need two T5 timing belts.

In the IRC channel I was suggested to use Pronterface.py instead of ReplicatorG as a computer side controller of the board, but after the first few times I couldn’t get the thing to launch and reverted to ReplicatorG. Not that it matters at the moment, because even with the ATMega replaced and properly bootloaded and running Gen7 Teacup, I can’t get any readings or functions out of it. I made a video of my attempts and you can watch it below; it’s dry but you get to watch me prod an inanimate object with clumsy fingers.

[x_video_embed no_container=”true”][/x_video_embed]

Mom and Tomasz decided to visit now as well. I’ve shown them the archipelago and then my allotment garden and then the KKV workshop and then mom left and now Tomasz is stuck with me while I whine about the RepRap and hush him while recording troubleshooting videos. You can actually hear him in the video above, so it’s well worth watching for that alone! Also, I totally destroyed him at pingpong earlier today, and have video of that as well.

Doing the RepRap #5 — The fun of frying

Good god damn goat balls.

I finally got the bootloader onto the ATMega — thanks to a lot of trial and error and handwringing and help from ethereal beings on the Internets and KKV, and with the motors and Pololus installed I hook the PSU into the board and the LEDs are shining and — wait a minute, isn’t the processor a teensy bit too hot? Oh, let’s touch it — well whaddayaknow, it’s blistering my finger, how peculiar!

As it turns out, I’ve soldered the Molex connector the wrong way around, so am feeding 5V to where I need 12V and vice versa. Which means some components are now fucked, possibly including the ATMega. I guess I ought to be grateful that none of the capacitors blew up in my face, but right now I’m just going to bed.

Below are some helpful links left for future reference

I found a good description for what the bootloading process is about here: http://smileymicros.com/blog/2011/03/04/busy-as-a-beavratmega644-on-a-breadboard/

Resources on what AVR’s are: http://www.evilmadscientist.com/article.php/avrstuff

A tutorial on what AVR programming is about, somewhat technical: http://www.ladyada.net/learn/avr/

Using the AVR ISP MkII as a programmer to bootload ATMegas. Relevant if I get me the programmer, but can give inside into the process: http://www.arduino.cc/playground/Code/OSXISPMKII

Crosspack is a complete AVR developing package, not sure how to implement the homebrewn boards there, but the bootloaders should be more or less generic, right? http://www.obdev.at/products/crosspack/index-de.html

Wormfood has a baud to Mhz calculator here, which I’m sure is good for something down the line: www.wormfood.net

A thread started in 2006 about the process of getting the Arduino to act as an ISP, which I never succeeded in doing: Turn Arduino into an ISP programmer

The schematics for my model of Arduino, the old NG, are here: arduino_NG_schematic.png and there’s a description of most of the parts and ports here: www.arduino.cc

I’m not sure of what this page does but it seems handy: http://www.sengpielaudio.com/calculator-ohm.htm

Doing the RepRap #4 — the art of failing on a small scale

As a preface to this post, let me reiterate that I’m doing this writeup so that people in a similar position as I might benefit from my mistakes and experiences. I’m learning all of this as I go, and imagine that anyone somewhat dedicated but with no prior experience might run into the same conceptual problems as I. The past week has proven that reasoning ab initio is all good and well if you actually know the “initio” part. My ignorance of physics and maths leave me with little but a smidgen of formal logic to draw any conclusions from electric schematics, and that’s really not helpful when it comes to burning a blasted bootloader onto a gosh darned ATMega644 20PU.

As the saying goes: When the only tool you have is a hammer, everything looks like a nail. And right now I feel as if I have one of those oversized blow-up hammers, banging away at the problems like a drooling cretin.

Let’s start with what I’ve actually accomplished. I’ve scavenged a small computer fan and a 300W power supply, which made me feel all dumpster diving and glowing. Not sure if the PSU is enough to drive the heated bed alongside everything else, but it’s a start. I ordered and received four Pololus A4988 to control the five hybrid stepper motors (1.8°, 1200mA, 4V, 3.17kg holding torque) from Wetterott I also ordered

UPS didn’t bother to ring me when they where outside my door, so I had to bike for an hour to get the package; Apparently “courier” is Latin for “duuuur I’m driving around with your stuff.”

The Pololus are not the kosher ones, but according to spec they are almost the same as the recommended A4983, and can be used as “drop in replacements,” which remains to be seen. The holding torque of the motors might be too low to use for the extruder, but fine for everything else; worst case, I’ll get a stronger NEMA 17 sized motor for the extruder.

I also got the TTL-232R USB-to-serial-cable, which I thought would be enough to get the bootloader onto the ATMega 644 20PU. It turns out it’s good for controlling the final motherboard, but not burning the actual bootloader. I’ll get to that.

A couple of days ago Magnus over at KKV Elektronen brought his MakerBot over for a demonstration. It was swell to finally see a 3D printer in action, and I got a tiny teensy part for my RepRap printed. In the upcoming days I’m hoping to get the rest done, and I’ve found a local source for most, if not all of the metal parts. Hornbach turns out to have a large enough selection of washers and bolts and whatnuts to probably cover everything I need except the springs. I got threaded rods and unthreaded rods, at a fraction of the price I’d pay at Järnia, so I’ve scrapped the plans on getting it all as a kit from UK as the postage was prohibitive.

Perhaps it’s because I’m an anxious person, but it feels reassuring when I actually make the decision that what I have listed on the printout is the same thing which I hold in my hand, and put it into the shopping basket. It’s such a banal thing, but it took me a good five minutes before feeling sure that the “M8 fender washer” I was holding was similar enough to the one described.
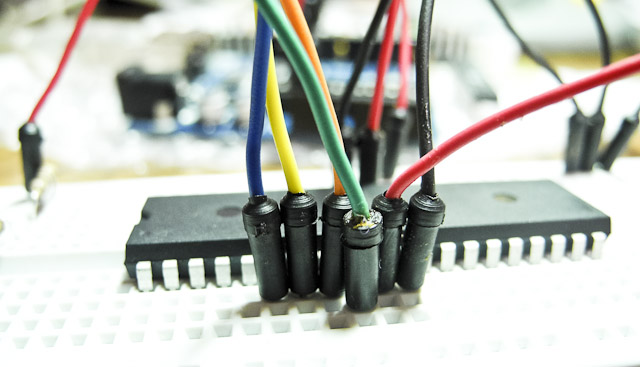
Once I had the Pololus I figured I would upload the bootloader and try to see if I could get the motors to spin. Piece of cake, no? Well, not really, as my desperate post over at the RepRap forums indicate.

The problem, as Traumflug points out in the above post, is that I have wired the whole thing wrong. I’m using the USB-to-serial cable, where I ought to use a programmer hooked into the six smaller pins on CONN6. I don’t have the programmer in the image he links, but find information to on how to use an Arduino microcontroller as a programmer instead; Arduino ISP – In-System Programmer.

I find one page on Instructables which seems to solve my problem: Using your Arduino ISP: Burning a bootloader. I set up the ATMega on a breadboard and hook it into my Macbook. At first, I get “USB pulling too much power” warnings, but that’s cause I hadn’t doublechecked my breadboard and was actually shorting the USB-port. Did you know that shorting your USB port can kill your wifi? Oopsie.

The only difference from the Instructable page is that I use the hardware files for the Gen7 electronics instead of the Sanguino. The option to use my board with my processor shows up under Tools>board so all is fine there.

I run “burn bootloader” with “Arduino as ISP” but get a timeout. So I try the other bootloader options and get the same thing. Doublechecking the processor I have the correct one set, so it’s not that. The Arduino works and runs other applications with no complaints. Searching the Arduino website I find Using Arduino as AVR ISP, which tells me that I need to upload a special sketch (Arduino application) called ArduinoISP to the microcontroller before using it as a programmer. That takes with no problem (I’m using the Arduino NG, and if you’re following along then don’t forget to hit the reset button before sending a new sketch to the Arduino)

I run Tools>burn bootloader>Arduino as ISP and get the error

avrdude: Yikes! Invalid device signature. Double check connections and try again, or use -F to override this check.

And running Tools>burn bootloader>AVR ISP gives:

avrdude: stk500_recv(): programmer is not responding
avrdude: stk500_disable(): protocol error, expect=0x14, resp=0xe0

Using the Arduino IDE for the bootloader isn’t supported in the official wiki, but Kliment over in the #RepRap channel mentions that starting the Arduino IDE as root allows him to use it to burn the bootloader. I get the same result regardless. Following the instructions for Linux terminal (bash) gives me balls, probably because the syntax differs from OSX — I’m going to check this out tomorrow.

According to the datasheet of ATMega 644, the voltage is ok, and the current shouldn’t be higher than 200mA over the pins 10-11 and 30-31, which they aren’t. I’m clearly missing something. I log into the #AVR channel on IRC and get a short description of what a bootloader is and that one can burn those in serial and parallell mode. What I’m trying to do is apparently “parallell mode” which is all fine and well but doesn’t get me closer to an answer.

I take a look at the top of the in-line documentation of the Arduino IDE sketch, and see this:

// this sketch turns the Arduino into a AVRISP
// using the following pins:
// 10: slave reset
// 11: MOSI
// 12: MISO
// 13: SCK

I realise that those are the same names that are listed on the Gen7 1.2 schematic as COMM6. Hosianna, perhaps my prayers are answered and problem solved. I drop the ATMega into its slot on my Gen7 board, and hook up the COMM6 to the Arduino. With much the same result as on the breadboard. Cockbucket!
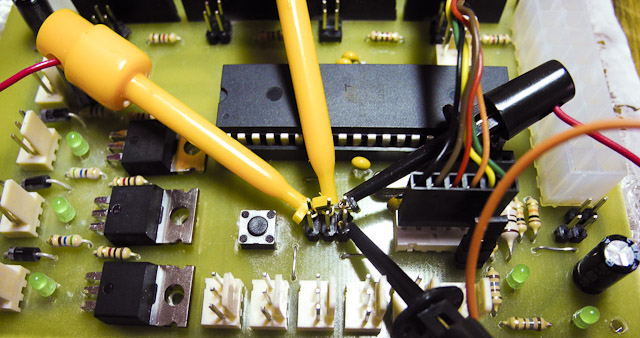
The day before Traumflug has mentioned that using the Arduino IDE doesn’t work cause it’s communicating too fast for the ATMega to keep up. It’s set to 1Mhz as default, but should go up to 8Mhz after a fuse has been burned on the chip. I have no clear grasp of what the Mhz denotes or how that relates to the speed of communications, but it seems critical. From computers in general, I’m guessing 1 Mhz means 1 million computations per second, but what it does to what is just beyond me. I know that I need to slow down somewhere, but not certain if I can do this in software or need to add crystals to the breadboard as per the description here and at the bottom of this page?

Default baud-rate for the Arduino IDE is 115200, which supposedly is okeydokey for a 16 Mhz chip, so perhaps I should just divide that into 16 and that might work? Can you see before your inner eye the magic chicken I’m waving above my workbench? I’m basically down to numerology here.

Regardless of how much I enjoy sailing the seas of doing new shit, whatever leaky vessel I’m in is currently waterlogged and I’m beginning to eye alternative options. As in getting a pre-programmed ATMega. It seems a shame to give in, having sacrificed brain cells and pulled hairs on the altar of geekdom, but perhaps I ought to choose my battles more wisely and forfeit this one to the processor. It does sting to be bested by an inert piece of plastic and metal on my kitchen table, but what the hell, if I can’t get it solved this week I’ll just buy a replacement. And program this chip with a brick. So it goes. Back into the fray, Smashy smashy.
Doing the RepRap #3

I’ve successfully drilled and soldered both the Gen7 v1.2 motherboard and optostops.

Redundancy is king so I made nine optostops, two of which seem broken — they light up regardless if you apply current. People in the forums helped me troubleshoot, but having confirmed that the sensors work (i.e. infinite resistance when the optos are blocked) I can’t find anything wrong with them.

What is more worrisome is that I haven’t yet tested the motherboard for shorts and whatnot; If I can mess up a 15-solder board, surely a 400-solder one is going to explode. This might be exiting; If my apartment burns down in the process, I’m crying force majeure and buying it finished, like most people seem to.

[x_video_embed no_container=”true”][/x_video_embed]

What is remaining is everything else. I need to get all the metal parts — nuts bolts and washers — and don’t really know where to order them here in Sweden. I’m tempted to order from McMaster-Carr only because they have such a well designed site it makes me all weepy.

Hopefully, I’ll get my hands on the printed parts along with an extruder — Wade’s geared extruder — later this week when we’re going to play around with a MakerBot at KKV Elektronen, printing the boards with components at some point; It’ll be great to finally get a look at a 3D printer in action, and get a hang of the software to run it.

Speaking of which, I have to load the bootloader onto the ATMega 644-20 PU, and hope to use an old Arduino I have laying around somewhere. Sounds simple, but this would also require me to get a power supply for the rig. (12V pushing 15Amps should do it. The machine only requires 5Amps, but the heated bed requires an additional 8Amps, so there you go.) The power supply needs to be hooked up to the board, as does the Arduino, so I need to figure out what cables to use and make those, after which I get to hook computer to Arduino and let it do it’s programming magic.

The optostops need to have flags made for them, preferably out of soda cans, so that the stops can be engaged for calibration and safety. I need a couple of 5mm wide belts to drive the extruder and bed, and I can either buy them directly or split them myself from more standard widths. Having chosen to go with Wades extruder, I need to manufacture or buy a hot-end, the part of the printer where the plastic poops out, as well as the hot-bed onto which the pooping will happen. So tonight is “ordering shit online” night. That, and crying into a bottle.

So far, this has been a crash course in electronics, and the fact that I haven’t yet been electrocuted or blown a fuse is encouraging. I can almost feel my neural pathways adapt to all these Ohms, Amps and whatnots, and it’s nice to learn something new again.

Doing the RepRap #2

Perhaps it’s the colder weather or perhaps the glass fibers I’ve inhaled are tickling my hypothalamus, but today I woke up early with the minimum of suicidal thoughts and have gotten a lot of stuff done. And it’s not even noon!

Most importantly, I’ve gotten around to ordering all the electronic component and connectors needed to finish the Gen7 1.2 motherboard and optostops. When envisioning the project, I was determined to bond with ELFA, to find a weary comrade at the store who would regale me with tales of how she set fires on things in her first project as well, and I would offhandedly follow the advice and recommendations for what to buy. Then I realised that ELFA is up to three times as expensive as some of the net stores, so screw that.

Last night I was up with a bottle of wine and a Dremel, trying to drill really fucking teensy holes in the PCBs. I was wearing a mask most of the time, but some of the glass fiber is bound to end up in my brain. Considering I’m doing this in the kitchen, let’s call it additional roughage. The drilling went well, and I managed to substitute the smallest drill bit with the conical diamond bit. I thought I would need a press drill for precision, seeing as the smallest holes are half a millimeter or so, but as long as you limit yourself to two glasses of wine you’re good. At three glasses you become a bit cavalier re:precision.

The parts I ordered were mostly from Reichelt with some remaining stuff from RS Components. Reichelt has a nice webstore with pretty pictures and all, but their customer service is either shy or enjoys receiving multiple emails with similar questions. Most businessess, I imagine, upon receiving an email asking “can I pay with Mastercard or do I pay on delivery?” would answer both parts of the sentence, not limiting themselves to “You cannot pay with Mastercard.” Playing coy might be a good way of wooing the shy guy with a beret, but I’m trying to pay for your services so no need to beat around the bush here.

Before I got to the stage of drilling holes and ordering parts, let me tell you the story of how I learned of which parts to order. I believe it’s telling of how quickly one gets mired in tracking down information when you know as little as I do on a topic.

In order to make the PCB I had to find a list of the required parts to mount on the PCB. I couldn’t find anyone who could tell me what parts are required. I couldn’t find a written list of parts, but there were instructions somewhere on the wiki telling me to open up a file of a certain type, changing a setting in an application, and then export a BOM — Bill Of Materials. No hint of what the file name is nor what application is required, but OK.

So I go onto the #reprap IRC channel and ask my stupid questions and get very little response. Someone recommends that I check out gEDA PCB, an open source application for creating PCBs and schematics, because EAGLE might not be able to open the file I need to open, whichever file that is. GEDA is actually mentioned on the wiki, but there’s no information as to what it is or where to get it, so I thought it was a filetype at first.

I check out gEDAs homepage, which tells me that I need to compile the application from source. Ok, so poke about a bit then realise that gEDA requires FINK to install, which in turn requires installing FINK and dependencies via the Terminal, which I’m shamefaced to admit I suck at using. FINK requires the Xcode developer tools, so I leave that to download for half an hour and then have the Devtools install running in the background while I try to get a feel for the RepRap IRC community.

Among the running chatter of people troubleshooting their machines, there was some discussion about the first case of 3D fabbing copyright infringement, when someone recreated a prop from a Paramount movie and they got on his case. It’s surely a sign of things to come, but as long as there are open source 3D apps and DIY printers, I don’t see how you could stem the tide of personal infringement. It’s a short read and worth checking out:

→ Torrentfreak, enigmax: Paramount Cease and Desist Targets 3D Printer ‘Pirate’

Anyway, with the Xcode developer tools installed, I notice that FINK isn’t available as a binary for 10.6, so I download a tarball and follow the instructions for compiling FINK using the Bash Terminal. Compiling FINK has actually been the most straightforward thing I’ve done so far, as the installation was really friendly and considerate; Like a well lubed proctologist with good blood circulation.

It took me a moment to realise that I need to enable unstable packages in FINK, after which gEDA installed fine while I fell back on default selections when asked about plugins and whatnot. I’m not sure if I screwed something up in the process, cause gEDA took two hours to compile even though I had engaged all eight cores.

With gEDA installed, I find the PCB app in ~/sw/bin/pcb and open up the Gen7Board.pcb file from the app. And lo and behold, there’s a “BOM” alternative under “Export…” which gives me a list of components and their place on the board. All in a text-file which you have to manually open cause it has no filetype extension. Looking over the list of parts, I’m still confused since some of the parts are labelled “unknown” which is somewhat ominous. In the chat, Traumflag himself shows up (The guy who created and maintains Gen7 1.2) and I ask my silly questions again.

Turns out, there’s a complete parts list on the wiki, and he promptly sends me a link.

Now. When you’re as green as I am on a subject, it can be difficult for an outside observer to distinguish me from a lazy bum, but I swear I’ve gone up and down that fucking wiki and not found any links to a parts list for the Gen7 1.2 board. Apparently, Google can’t find any pages linking to it either (as of July 1st at least) so perhaps there aren’t any. I don’t know how it’s possible not to link internally somewhere on a wiki, but at least it made me feel less stupid, albeit still frustrated.

In grassroots open source project such as the RepRap community, writing documentation is boring and little value seems attributed to it and consequently little work is done on it; On the other hand, it’s really simple to get in touch with whomever designed the part you need help with, and people are often kind and willing to lend a hand.

So, with a followup email from Traumflag, I had a complete list of parts. And since the wiki contained direct store links to the components, I took the sensible approach and ordered the goddamn parts already. Though Reichelt slapped on some banking fee, the parts were most certainly cheaper than ELFA; And even if I could have tried to source cheaper components, that would have taken me a couple more days, which I rather spend solving the next problem down the road. Which I predict there will be aplenty.

Doing the RepRap #1

For the betterment of humanity, or at least the part of it interested in rapid prototyping, I’ll try to document the process of building my RepRap. So far, I have etched a shabby PCB — it’s the Gen7 v1.2 board — and I’ve tested it for shorts. It’s not the prettiest board I’ve seen and I’ll make a backup, but hopefully it’ll survive my cutting and drilling.

I’ve ordered a soldering station, having poured over reviews of different models and asking any person who has ever had a passing acquaintance with anything more advanced than a toaster, and ended up getting the Weller WHS40. I’m picking it up on Monday from ELFA, along with some solder, and will set it all up in the kitchen. Hopefully there won’t be enough fumes to kill any plants and/or people.

The instructions on the RepRap project wiki are confused and make me miserable. Many pages are not maintained properly and often seem to contradict each other. Using a wiki as documentation repository is all well and fine, but it’s not very pedagogical and frustratingly difficult to find even the PCB layout for the boards, as each new design is explained by the people working on it using whatever nomenclature — or lack thereof — they fancy. I don’t expect this process to be easy, but can for the life of me not understand why you would spend thousands of hours developing an awesome project intended to be a disruptive technology, and then fuck up the instructions. I found some excellent assembly tutorials though, which should be of great help once I’m building the actual rig.

I had a horrible time finding ready-to-print PCB layout schemes, so I backtracked the process and am trying out PCB CAD software. I haven’t been mired in learning new software in a while, so this will be interesting. Learning stuff while doing other stuff is a feature not a bug, so this might be an interesting way of learning more about electronics and CAD. As it is, I’m learning all skills necessary for the project on-the-go. I did some soldering in grade school, and I know how not to blow up my multimeter, and that’s about it as for my skillz. If I manage to build this thing — and get it to run — I suspect that most any primate should be able to.

The first PCB software I’m trying out is Eagle from Cadsoft
The build instructions for the Gen7 1.2 board are here: reprap.org/wiki/Motherboard_1_2
Layouts for the PCB are here: github.com/Traumflug and a ready to print PDF in Gen7Board Layout.pdf