As a preface to this post, let me reiterate that I’m doing this writeup so that people in a similar position as I might benefit from my mistakes and experiences. I’m learning all of this as I go, and imagine that anyone somewhat dedicated but with no prior experience might run into the same conceptual problems as I. The past week has proven that reasoning ab initio is all good and well if you actually know the “initio” part. My ignorance of physics and maths leave me with little but a smidgen of formal logic to draw any conclusions from electric schematics, and that’s really not helpful when it comes to burning a blasted bootloader onto a gosh darned ATMega644 20PU.
As the saying goes: When the only tool you have is a hammer, everything looks like a nail. And right now I feel as if I have one of those oversized blow-up hammers, banging away at the problems like a drooling cretin.

Let’s start with what I’ve actually accomplished. I’ve scavenged a small computer fan and a 300W power supply, which made me feel all dumpster diving and glowing. Not sure if the PSU is enough to drive the heated bed alongside everything else, but it’s a start. I ordered and received four Pololus A4988 to control the five hybrid stepper motors (1.8°, 1200mA, 4V, 3.17kg holding torque) from Wetterott I also ordered
UPS didn’t bother to ring me when they where outside my door, so I had to bike for an hour to get the package; Apparently “courier” is Latin for “duuuur I’m driving around with your stuff.”
The Pololus are not the kosher ones, but according to spec they are almost the same as the recommended A4983, and can be used as “drop in replacements,” which remains to be seen. The holding torque of the motors might be too low to use for the extruder, but fine for everything else; worst case, I’ll get a stronger NEMA 17 sized motor for the extruder.
I also got the TTL-232R USB-to-serial-cable, which I thought would be enough to get the bootloader onto the ATMega 644 20PU. It turns out it’s good for controlling the final motherboard, but not burning the actual bootloader. I’ll get to that.
A couple of days ago Magnus over at KKV Elektronen brought his MakerBot over for a demonstration. It was swell to finally see a 3D printer in action, and I got a tiny teensy part for my RepRap printed. In the upcoming days I’m hoping to get the rest done, and I’ve found a local source for most, if not all of the metal parts. Hornbach turns out to have a large enough selection of washers and bolts and whatnuts to probably cover everything I need except the springs. I got threaded rods and unthreaded rods, at a fraction of the price I’d pay at Järnia, so I’ve scrapped the plans on getting it all as a kit from UK as the postage was prohibitive.
Perhaps it’s because I’m an anxious person, but it feels reassuring when I actually make the decision that what I have listed on the printout is the same thing which I hold in my hand, and put it into the shopping basket. It’s such a banal thing, but it took me a good five minutes before feeling sure that the “M8 fender washer” I was holding was similar enough to the one described.


Once I had the Pololus I figured I would upload the bootloader and try to see if I could get the motors to spin. Piece of cake, no? Well, not really, as my desperate post over at the RepRap forums indicate.
The problem, as Traumflug points out in the above post, is that I have wired the whole thing wrong. I’m using the USB-to-serial cable, where I ought to use a programmer hooked into the six smaller pins on CONN6. I don’t have the programmer in the image he links, but find information to on how to use an Arduino microcontroller as a programmer instead; Arduino ISP – In-System Programmer.
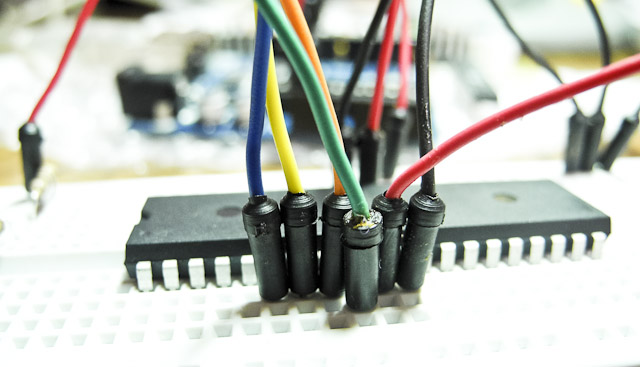
I find one page on Instructables which seems to solve my problem: Using your Arduino ISP: Burning a bootloader. I set up the ATMega on a breadboard and hook it into my Macbook. At first, I get “USB pulling too much power” warnings, but that’s cause I hadn’t doublechecked my breadboard and was actually shorting the USB-port. Did you know that shorting your USB port can kill your wifi? Oopsie.
The only difference from the Instructable page is that I use the hardware files for the Gen7 electronics instead of the Sanguino. The option to use my board with my processor shows up under Tools>board so all is fine there.
I run “burn bootloader” with “Arduino as ISP” but get a timeout. So I try the other bootloader options and get the same thing. Doublechecking the processor I have the correct one set, so it’s not that. The Arduino works and runs other applications with no complaints. Searching the Arduino website I find Using Arduino as AVR ISP, which tells me that I need to upload a special sketch (Arduino application) called ArduinoISP to the microcontroller before using it as a programmer. That takes with no problem (I’m using the Arduino NG, and if you’re following along then don’t forget to hit the reset button before sending a new sketch to the Arduino)
I run Tools>burn bootloader>Arduino as ISP and get the error
avrdude: Yikes! Invalid device signature. Double check connections and try again, or use -F to override this check.
And running Tools>burn bootloader>AVR ISP gives:
avrdude: stk500_recv(): programmer is not responding

avrdude: stk500_disable(): protocol error, expect=0x14, resp=0xe0
Using the Arduino IDE for the bootloader isn’t supported in the official wiki, but Kliment over in the #RepRap channel mentions that starting the Arduino IDE as root allows him to use it to burn the bootloader. I get the same result regardless. Following the instructions for Linux terminal (bash) gives me balls, probably because the syntax differs from OSX — I’m going to check this out tomorrow.
According to the datasheet of ATMega 644, the voltage is ok, and the current shouldn’t be higher than 200mA over the pins 10-11 and 30-31, which they aren’t. I’m clearly missing something. I log into the #AVR channel on IRC and get a short description of what a bootloader is and that one can burn those in serial and parallell mode. What I’m trying to do is apparently “parallell mode” which is all fine and well but doesn’t get me closer to an answer.
I take a look at the top of the in-line documentation of the Arduino IDE sketch, and see this:
// this sketch turns the Arduino into a AVRISP

// using the following pins:

// 10: slave reset

// 11: MOSI

// 12: MISO

// 13: SCK
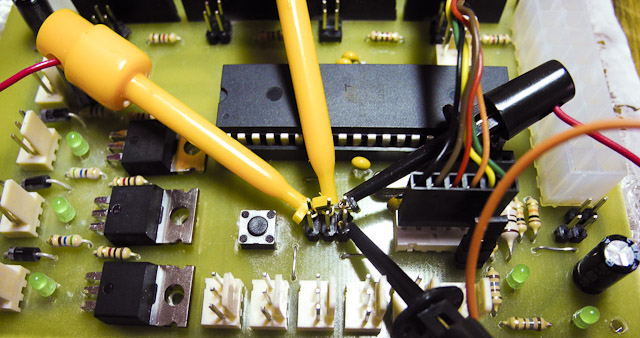
I realise that those are the same names that are listed on the Gen7 1.2 schematic as COMM6. Hosianna, perhaps my prayers are answered and problem solved. I drop the ATMega into its slot on my Gen7 board, and hook up the COMM6 to the Arduino. With much the same result as on the breadboard. Cockbucket!

The day before Traumflug has mentioned that using the Arduino IDE doesn’t work cause it’s communicating too fast for the ATMega to keep up. It’s set to 1Mhz as default, but should go up to 8Mhz after a fuse has been burned on the chip. I have no clear grasp of what the Mhz denotes or how that relates to the speed of communications, but it seems critical. From computers in general, I’m guessing 1 Mhz means 1 million computations per second, but what it does to what is just beyond me. I know that I need to slow down somewhere, but not certain if I can do this in software or need to add crystals to the breadboard as per the description here and at the bottom of this page?
Default baud-rate for the Arduino IDE is 115200, which supposedly is okeydokey for a 16 Mhz chip, so perhaps I should just divide that into 16 and that might work? Can you see before your inner eye the magic chicken I’m waving above my workbench? I’m basically down to numerology here.
Regardless of how much I enjoy sailing the seas of doing new shit, whatever leaky vessel I’m in is currently waterlogged and I’m beginning to eye alternative options. As in getting a pre-programmed ATMega. It seems a shame to give in, having sacrificed brain cells and pulled hairs on the altar of geekdom, but perhaps I ought to choose my battles more wisely and forfeit this one to the processor. It does sting to be bested by an inert piece of plastic and metal on my kitchen table, but what the hell, if I can’t get it solved this week I’ll just buy a replacement. And program this chip with a brick. So it goes. Back into the fray, Smashy smashy.